Updated July 6, 2018
It’s one of the truisms of needlepoint: Stitch the light threads before the dark ones.
I figured for a long time that this was leftover from the days when we only stitched in wool. Wool, being fuzzy, has fibers that can get caught in later stitches. A but of dark fibers in a light thread dirties the color. A bit of light fiber in a dark thread does not.
Then, since I didn’t stitch with wool so much, I didn’t worry about it.
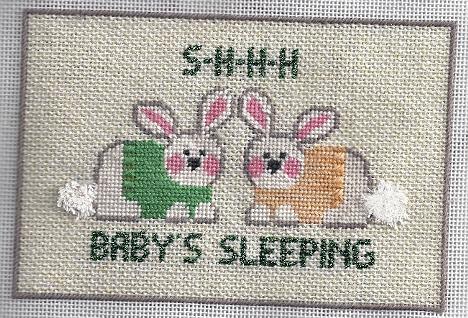
But look at my recently completed bunny piece. Some darker threads needed to travel from letter to letter or from face to face. But they don’t show through the lighter fur and background.
Why?
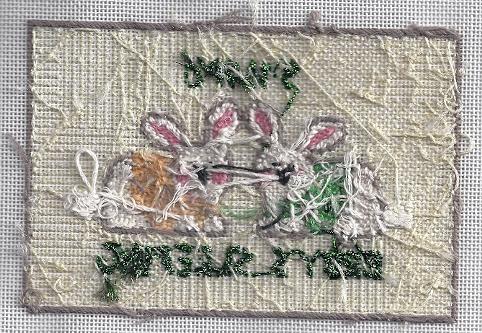
I stitched the lighter colors first. By doing this I create not only a stitched front, but a covered back. Now, the dark thread passes over three layers (stitch front, canvas, stitch back) instead of just one (canvas). You can see it in this picture of the back of the canvas.
This accomplished several things:
- I don’t stitch over the dark traveling thread so it doesn’t get caught in the lighter thread.
- By not stitching over the dark thread, that thread doesn’t get pressed against the canvas.
- Finally, no “shadows” of the dark thread are seen through the canvas because there are more layers of thread between the traveling thread and the viewer.
When beginning and ending threads, always do this in an area the same color or darker. Because passing through the backs of lighter stitches removes many of these benefits.

About Janet M Perry
Janet Perry is the Internet's leading authority on needlepoint. She designs, teaches and writes, getting raves from her fans for her innovative techniques, extensive knowledge and generous teaching style. A leading writer of stitch guides, she blogs here and lives on an island in the northeast corner of the SF Bay with her family
Janet, I’ve known about doing light colors first for a long time, but what do you do when you have areas that need to be outlined in black and the fill color is light? I’ve been putting off stitching a canvas because the dancing figures are in various colors, but completely outlined in black. Any suggestions would be greatly appreciated. Thanks, Libbi
Libbi —
This is a great question. I guess my answer is “It depends.” The main question is how important is the outline to the design.
If the outline is continuous and important to the design, like leading in a stained glass pattern, stitch the outline first. Because it’s continuous, you won’t have a problem with traveling threads because it’s a solid line. It also gives you a handy way to start and stop threads later.
If the outline in continuous for an area, but not continuous throughout (i.e. areas aren’t joined by the line), stitch the outline for each area first, but start and end each area of the outline within itself. Don’t have traveling threads between areas.
If the outline is not continuous or if you want the outline to be thinner, then stitch the outline after stitching the interiors. If the line is not solid, you’ll have traveling threads and can’t avoid it. If you want the line to be thin, you might use something such as Whipped Backstitch that creates a thin line and should be done after the areas around it are stitched so that there is not exposed canvas under the thin outline.
HTH.
Keep Stitching,
Janet
Janet, thanks for your comments. As soon as I finish the canvas I’m working on, I will start the canvas with the outlined figures. I’m going to try to make sure I use a “down” stitch when I’m next to the black outline stitches to avoid as much wool fuzz as possible. Your analogy of “stained glass” was a perfect visualizaton, and I’m going to outline the figures first. Thanks again, Libbi